Showing posts with label MME. Show all posts

Tuesday, February 20, 2018

Oh Boy!

 Today I did the second challenge from Stuck?! Sketches blog! I used up some old MME About a Boy stash I had.


Here is the awesome sketch!
 

Thanks for looking and be sure to check out the challenges at Stuck?! Sketches blog.
Your comments are always appreciated
Donna

Friday, May 8, 2015

Project Life Wedding

Hello, Donna here with a project I am working on for Inspiration Station. I am not a real big Project Life person, I like to focus on one or two really good pictures on a page, but I take and print a ton of pictures, and here is a way to add a lot of pictures to a page. So for my son's wedding album I took all the left over pictures and did some Project Life pages. Here are two that I just finished using MME's new line "Fancy That". This line is so pretty and a great way to use up those embellishments. In addition I made a Shaker box with a tutorial below.

 
Here is another page of the reception.
 
 
I made this little book to add additional journaling or a picture, a mini album in a pocket if you will.


And the tutorial....


Products used: MME "Fancy That" paper and embellishments Pink cardstock Bo Bunny Double Dot cardstock.
Thanks for stopping by today!
Donna Coughlin

Friday, May 1, 2015

Flower video tutorial

Hi everyone, Today I would love to share will you a layout I did for Inspiration Station in CT. I used the MME line Fancy That. Besides the paper which is so beautiful, I just am loving this line and all the embellishments. I love using all sorts of embellishments and this line gives me that opportunity to mix and match them all! Also please check out the video on how I made the flower at the top of the layout. So easy and it looks just like a Petaloo or Prima flower


Don't you just love this little die-cut! I added a gold foil heart on top, looks cute!


The finished flower - so easy to make!


And here is the video!
 
Products Used:
MME Fancy That paper, chipboard, brads, Flair, assorted die cuts/ephemera, foiled journal cards, transparency, and 6 sheet sticker pack.
Tim Holtz Distress Spray - Tattered Rose
Bo Bunny Shadow Dot
QuicKutz Pocket Scrap Dies - Love
white cardstock
twine
 
Thanks for stopping by and be sure to stop in at Inspiration Station and check out all the latest and greatest scrapbook supplies!
 
Donna

Friday, April 24, 2015

New MME line

Hi Donna Coughlin here for Inspiration Station in Stafford, Ct and I would love to share this layout I did using MME new line called "Fancy That". The colors in this line are beautiful and delicate and not only can be used for a wedding, but for a baby or a girlish layout. But what is really super about this line are the embellishments and accessories which are amazing! They have everything possible to match the paper. This is also great for project life albums because of all the embellishments you have to choose from.

The picture is of my granddaughter Sadie, who was born last year. The black journaling card was perfect to add the journaling with a white pen from Marvy. and the title came from the assorted die cuts/ephemera which blended in perfectly with the paper.  The transparency frame with the gold frame and banner going across was a great way to dress up the picture.

 
I LOVE to dress up embellishments and make clusters out of them. Here I took from the MME Fancy That line I started with the lace doily from the Die cut pack and took the heart and sweet from the chipboard pack, and added a brad. Under the doily I used a tag I cut from QuicKutz Pocket Scrap and  Dies - Love and used the rub-on's from MME and the little white sticker with the gold heart I was in the sticker pack. I also used Hero arts Pearls and Gems.  
 

 These cute little chipboard buttons were dressed up with a small piece of twine and I added a brad.
 
This beautiful corner was also in the  QuicKutz Pocket Scrap Dies. After I cut it I realized I needed to darken it a little, so spritzing it with some Tim Holtz Distress Spray - Tattered Rose gave me the correct color I wanted. Simply by added a brad dressed it as well. Also the back side of this sheet of paper was embossed and if you look closely you can see the leaves coming through the pink side of this paper.


 Added some more of the Hero Arts Pearls and Gems to some of the flower centers on the chipboard as well as on the patterned paper, just a little touch here there goes a long way!

 
Products Used:
MME paper, chipboard, brads, assorted die cuts/ephemera, rub-on's, foiled journal cards, transparency, and 6 sheet sticker pack.
Hero Arts Pearls & Gems
Tim Holtz Distress Spray - Tattered Rose
QuicKutz Pocket Scrap Dies - Love
Marvy Reminisce White Pen
Bo Bunny Shadow Dot (gray)
white cardstock
 
Thanks for stopping by and be sure to stop in at Inspiration Station and check out all the latest and greatest scrapbook supplies!
 
Donna


Saturday, April 18, 2015

Hello Cupcake!

Who doesn't love cupcakes? My granddaughter obviously does! I made this using Rachels sketch from Sketches in Thyme.  I used MME Hello World, and some Momenta embellishments,

 
On the right are home made enamel dots, pretty cool huh? I didn't mean to make a second title but when I saw the girls rock card I just thought it would be cool to add "and so do cupcakes!"
 
 
Thanks for stopping by and be sure to visit Sketches in Thyme!
Thanks Donna
 

Saturday, April 11, 2015

Travel Log

Hi, Donna Coughlin here with a project done for The Inspiration Station design team! Today I am using the new MME line called Hello World. I made this mini album out of envelopes (see video below for instructions, and for the finished product. I will show you some pics, but the video of the finished project shows all the hidden pockets. This album has so much space for storage! On the cover I used MME stickers, wood veneers, chipboard, and Flairs.


Untied!


 First page has a pocket on the top left and belwo two pockets! Used Wood Veneers, transparencies, sticky nots, chipboard and stickers!
 
This page has lots of pockets! I used chipboard, stickers, transparencies, rub-ons and post it notes. So much fun to mix and match embellishments.
 

When I fill this in for pictures I am going to put an arrow to where in North America we were! Used rub-on and chipboard.

 
 Final page! Behind the transparency I left open, so I can add a picture and below there is a pocket!

Here is the tutorial for making a mini envelope album.
.
 
 And the finished album, lots of storage
 
Thanks I hope I encouraged you try to make one of these albums, there are so many ways you can change this up, the possibilities are endless! Thanks for stopping by! Donna

Sunday, November 23, 2014

Sketches in Thyme

I love Sketches in Thyme for inspiration! Here is a sketch a did this week using one of the sketches for this month done by Rochelle Spears.

 
Here is the sketch for Rochelle

Wednesday, November 12, 2014

Do you what love

Here is my granddaughter, the adventurous one! I did this layout using Sketches in Thyme sketch for November. Enjoy! I used MME About a girl paper and chipboard. The Pinwheels I got from Michaels.
 

Monday, August 6, 2012

Blueberries


MY granddaughter loved going over to my sister's to pick blueberries, but even better was eating them!

Friday, October 15, 2010

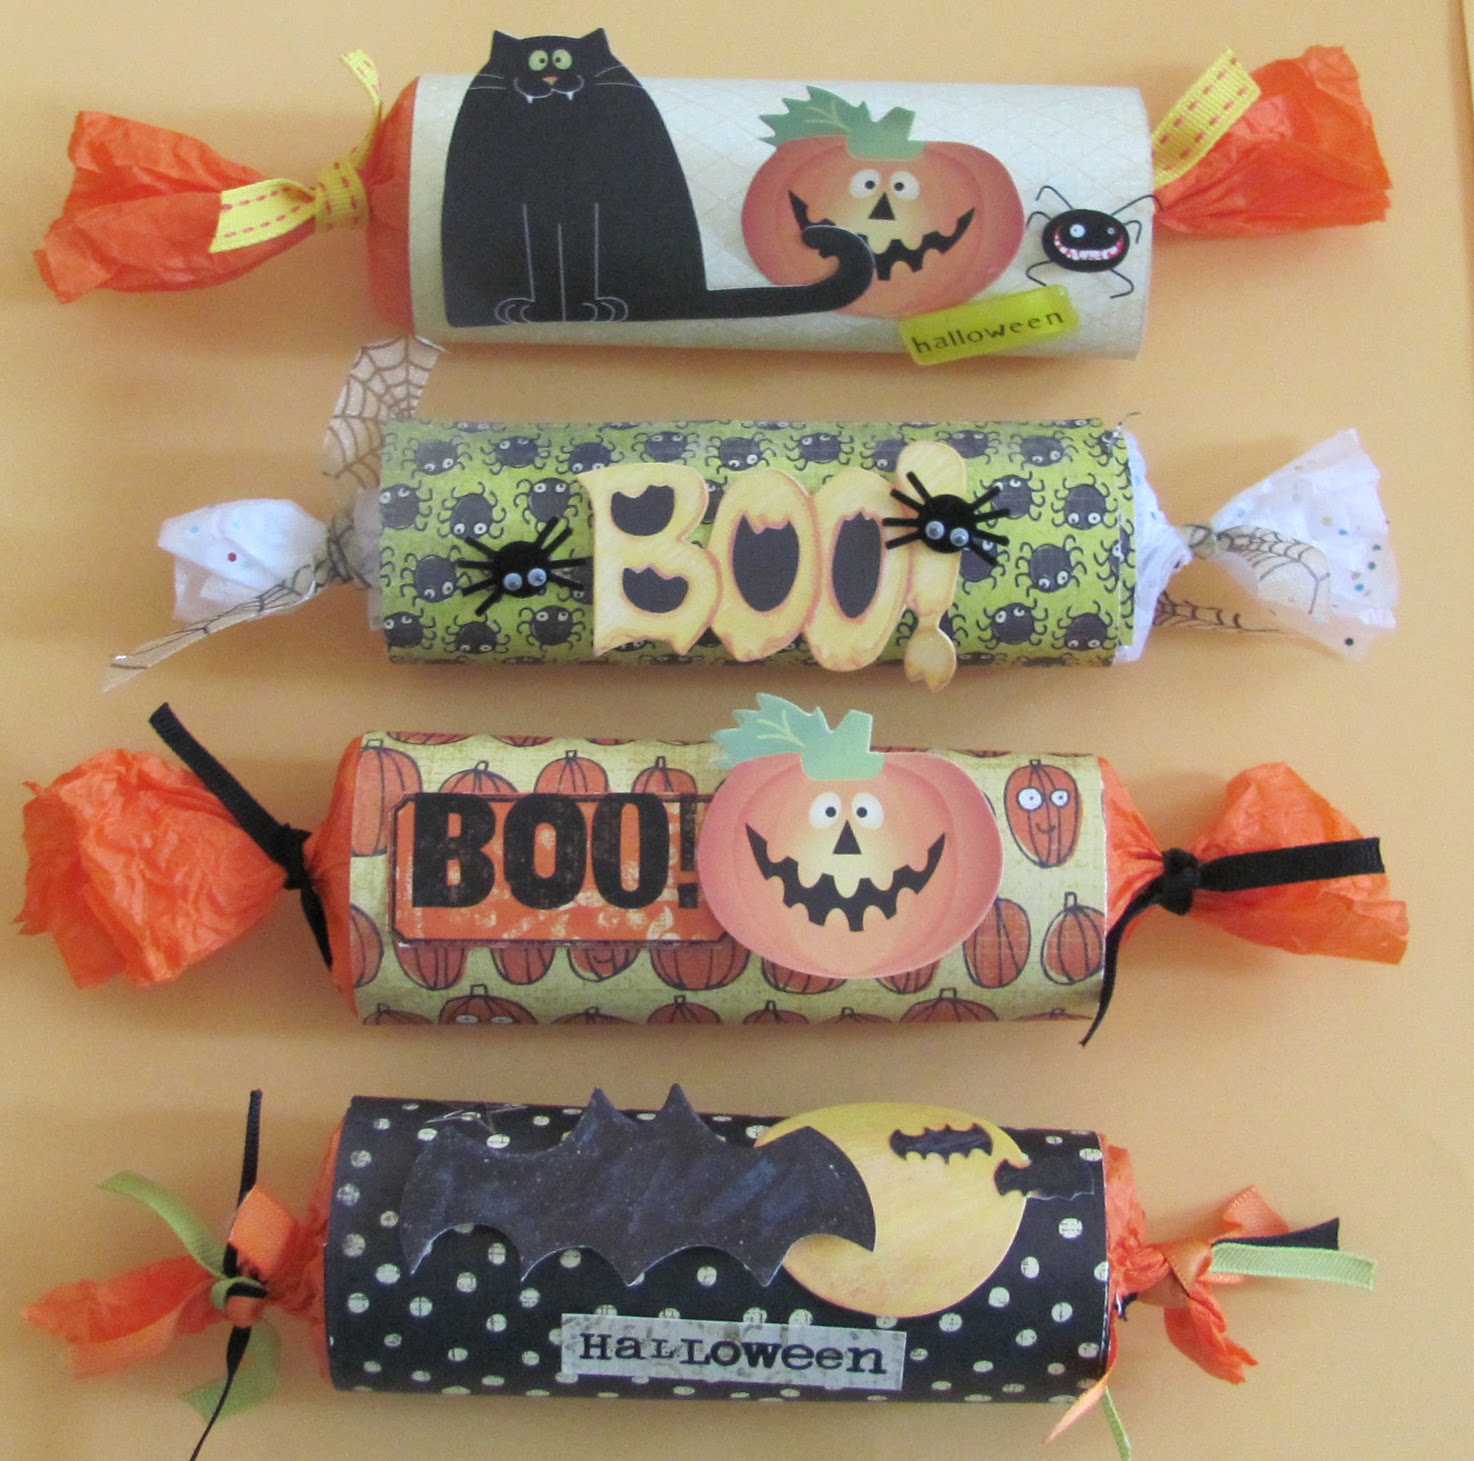
Candy rolls

Hi everyone! It's getting closer to Halloween! Today I would like to show you how I made up these cute little candy rolls. These are so easy to do, you can make them as simple or elaborate as you want.


First thing you need to do is gather your supplies.
Toliet paper rolls or a paper towel roll cut to your desired length
Halloween paper - I used the adorable MME BOOline that just came out.
Tissue paper
Glue dots>
Halloween die cuts or any assortment of Halloween decorations
Scotch tape or glue
Of course candy!


First thing you have to do it put your candy inside the roll. I fit three fun size bars into one roll. Easy peasy!


Next take a piece of tissue paper cut about 5 inches longer than the roll and wrap the tissue paper around it, take the back, and twist the edges.


Take a piece of your Halloween paper the width and length of the roll, wrap it around and tape or glue the end.

Finally decorate as desired, I used Glue dots to make some of the elements stand out a little. And that is all there is to it! Have fun and happy haunting!